A clean, smooth wall can make a room look finished and beautiful. But if you have ever sanded drywall by hand, you know it is messy, tiring, and slow. Clouds of dust fill the air, settle on furniture, and make cleanup a nightmare. This is where a drywall sander with vacuum changes everything. If you are a contractor, DIY renovator, or even a homeowner tackling a home project, this tool can save you time, keep your space cleaner, and deliver better results. Let’s explore how these sanders work, what makes them special, and how to choose the right one for your needs.
What Is A Drywall Sander With Vacuum?
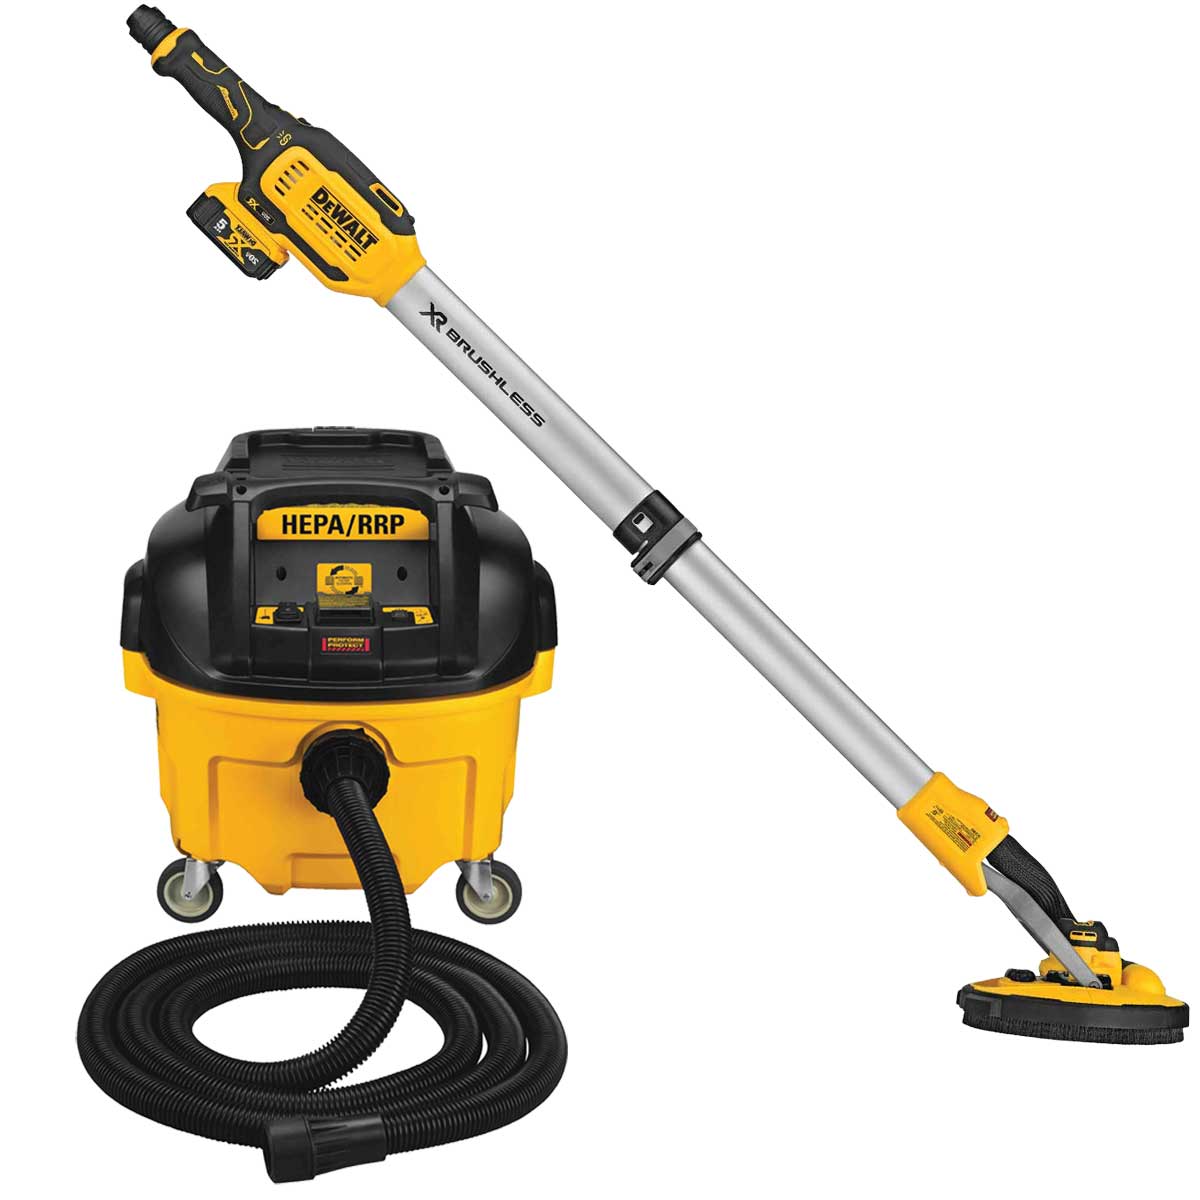
A drywall sander with vacuum is a power tool designed to smooth drywall joints, remove old paint, or prepare walls for painting. Unlike manual sanding, these tools come with a built-in or attachable vacuum system that collects most of the dust as you work. This combination keeps the work area much cleaner and protects your lungs from harmful dust particles.
Most models feature a rotating sanding head attached to a motor, with a hose that sucks in dust directly from the surface. They often have adjustable handles, different speed settings, and interchangeable sanding pads to suit various tasks. Some versions are called “dustless drywall sanders” because they can capture up to 95% of the dust.
Why Use A Drywall Sander With Vacuum?
Drywall dust is more than just a nuisance—it can be a health risk. Breathing in fine particles may cause respiratory issues, especially during large projects. Here are a few reasons why these sanders are popular:
- Cleaner workspace: Dust is collected as you sand, reducing mess.
- Healthier environment: You inhale less drywall dust.
- Less time cleaning up: You can finish projects faster.
- Better finish: The tool sands more evenly than by hand.
Many professionals will not work without a sander that includes a vacuum function, especially for indoor projects or remodeling in homes that are lived in.
Types Of Drywall Sanders With Vacuum
There are several main types of drywall sanders with vacuum options. Understanding each can help you choose the best one.
1. Pole (telescopic) Sanders
These sanders have a long, extendable handle so you can reach ceilings and high walls without a ladder. The vacuum hose runs through the pole, keeping dust away from your face.
2. Handheld Sanders
Handheld drywall sanders are compact, lightweight, and ideal for small areas, corners, or tight spaces. They usually have smaller dust collection bags or can connect to a shop vacuum.
3. Automatic (self-contained) Sanders
Some advanced models have a built-in vacuum motor and dust container. You do not need a separate vacuum, which makes them portable and easy to set up.
4. Orbital Sanders
These use a circular, rotating motion to sand the wall. They are especially good for finishing and smoothing surfaces, but less effective for heavy removal.
5. Detail Sanders
For edges, corners, and intricate spaces, a detail sander with vacuum attachment helps you get a professional finish even in hard-to-reach areas.
Key Features To Look For
Not all drywall sanders with vacuum are the same. Here are important features to consider before buying:
Power And Speed
A strong motor (usually measured in amps or watts) helps sand more efficiently. Variable speed control allows you to adjust the sanding intensity depending on the task. For example, use a lower speed for fine finishing and a higher speed for quick material removal.
Dust Collection Efficiency
Look for a model with a high dust capture rate (90% or higher is best). A long, flexible hose and a large dust bag mean fewer interruptions.
Weight And Handling
If you are sanding ceilings or large walls, a lighter tool will save your arms and back. Adjustable handles and ergonomic grips also make long jobs more comfortable.
Pad Size And Shape
Larger pads cover more area quickly, but smaller pads are better for detail work. Some tools let you swap out pads to match the job.
Durability And Build Quality
Construction materials (like aluminum or reinforced plastic), strong joints, and quality bearings matter for tools that see heavy use.
Noise Level
Some sanders are very loud. If you are working indoors or for long periods, look for quieter models or use hearing protection.
Accessories And Attachments
Extra sanding discs, extension poles, and replacement filters can add value and make your tool more versatile.
How Does A Drywall Sander With Vacuum Work?
When you switch on the sander, the motor spins the sanding pad. As you move the pad over the wall, it smooths the surface by removing small layers of drywall compound, paint, or old wallpaper. At the same time, the vacuum creates suction through holes in the sanding pad, pulling dust into a hose and then into a collection bag or container.
This dual-action design means you can sand large areas much faster, without stopping to wipe away dust or sweep the floor.
Step-by-step Guide: Using A Drywall Sander With Vacuum
If you are new to drywall sanding, follow these steps to get the best results and avoid common mistakes.
1. Prepare The Room
- Remove or cover furniture and electronics.
- Tape plastic over doors, vents, and windows to stop dust from escaping.
- Wear a dust mask, safety glasses, and ear protection.
2. Set Up The Sander
- Attach the vacuum hose and check that the dust bag or canister is empty.
- Choose the right grit sanding disc (start with 120 or 150 for general work).
- Adjust the handle length for comfortable reach.
3. Start Sanding
- Hold the sander flat against the wall.
- Turn it on and let the pad reach full speed before touching the surface.
- Use slow, steady movements. Do not press too hard—the weight of the tool is usually enough.
- Overlap your passes to avoid missing spots.
4. Corners And Edges
- Switch to a detail sander or sand by hand for tight corners.
- Be gentle around electrical outlets and trim.
5. Check Your Progress
- Stop every 10–15 minutes to check the wall for missed spots or scratches.
- Replace sanding discs if they clog or wear out.
6. Clean Up
- Empty the dust bag or canister as soon as it is half full.
- Wipe down the tool and store it in a dry place.
Credit: www.shopamestools.com
Comparing Popular Drywall Sanders With Vacuum
Let’s look at how some of the best-known models compare on key features. The table below highlights differences in power, weight, dust collection, and more.
| Model | Motor Power | Weight | Pad Size | Dust Capture | Price Range |
|---|---|---|---|---|---|
| WEN 6369 | 5.0 Amp | 9 lbs | 9 in | Up to 95% | $$ |
| Festool Planex | 3.6 Amp | 8.8 lbs | 8.5 in | 98%+ | $$$$$ |
| Porter-Cable 7800 | 4.7 Amp | 8.5 lbs | 9 in | Up to 95% | $$$$ |
| Hyde 09170 | Hand Power | 2 lbs | 6 in | Up to 90% | $ |
Tip: For large projects, a more powerful sander saves time. For small jobs, a lighter, manual tool might be enough.
Benefits Of Using A Drywall Sander With Vacuum
The main advantage is dust control, but there are several other benefits:
- Faster work: Power sanders cover more area quickly.
- Smoother finishes: The even motion gives a more professional look.
- Less fatigue: You do not need to use as much muscle.
- Safer air: Reduced dust means fewer health risks.
- Better for occupied spaces: You can sand without making a mess in homes or offices.
Some contractors report cutting their cleanup time in half. Homeowners appreciate not having fine dust settle on every surface. For allergy sufferers, this is a game-changer.

Credit: bravextools.com
Common Mistakes And How To Avoid Them
Even with the best tools, mistakes can happen. Here are some common problems and tips to avoid them:
- Using the wrong grit: Start with medium grit (120–150), then move to finer grit for the final pass. Coarse grit can scratch the wall.
- Pressing too hard: Let the tool do the work. Too much pressure can leave swirl marks or gouge the wall.
- Not moving steadily: Slow, even strokes are best. Pausing too long in one spot can create uneven patches.
- Skipping the mask: Even with dust collection, always wear a mask for safety.
- Ignoring maintenance: Clean or replace filters and pads regularly to keep the vacuum working well.
- Overfilling the dust bag: Empty it before it is full to prevent clogs and maintain suction.
Drywall Sander With Vacuum Vs. Traditional Sanding Methods
How does a drywall sander with vacuum compare to old-fashioned sanding? See the main differences below:
| Feature | Drywall Sander w/ Vacuum | Manual Sanding |
|---|---|---|
| Dust Control | Excellent (up to 98%) | Poor (dust everywhere) |
| Speed | Fast, efficient | Slow, tiring |
| Finish Quality | Very smooth, even | Good, but depends on skill |
| Physical Effort | Low | High |
| Setup Time | Moderate | Very little |
Non-obvious insight: Even if you are only sanding a small patch, dust from manual sanding can travel far, especially through air vents. This makes a vacuum sander useful even for small repairs.
Maintenance And Care Tips
To keep your drywall sander with vacuum working well, follow these tips:
- Clean after each use: Wipe dust from the tool and empty the bag or canister.
- Check hoses for clogs: Dust can build up inside, reducing suction.
- Replace or wash filters: Dirty filters make the vacuum less effective.
- Inspect cords and switches: Look for damage before each use.
- Lubricate moving parts: If your sander has bearings or joints, a drop of oil can keep it running smoothly.
A well-maintained tool lasts longer and works better, saving you money in the long run.
When To Rent Vs. Buy
Not sure if you should purchase a drywall sander with vacuum? Consider your needs:
- Rent if you have one or two rooms to finish and do not plan to use it again soon. Rental stores usually offer quality models with vacuum attachments.
- Buy if you are a contractor, plan to remodel several rooms, or want to tackle multiple projects over time.
Non-obvious insight: Some home improvement stores offer “try before you buy” deals—ask if you can apply rental fees toward a future purchase.
Cost Considerations
Drywall sanders with vacuum can range in price from under $100 to over $1,000. What affects the cost?
- Motor power
- Brand reputation
- Dust collection efficiency
- Included accessories
- Build quality
Higher-priced models often have better suction, longer warranties, and more comfortable designs. For most homeowners, a mid-range tool ($150–$350) is enough. Professionals may want to invest in top brands for daily use.
Safety Tips
Drywall sanding can be safe, but always follow these guidelines:
- Wear a mask and goggles: Even with dust collection, some particles escape.
- Use ear protection: Power sanders can be noisy.
- Secure cords and hoses: Avoid tripping hazards.
- Work in good light: Shadows can hide uneven spots or obstacles.
- Keep children and pets away: Sanding tools are not safe for curious hands or paws.

Credit: www.amazon.com
Environmental Considerations
Drywall dust is not just a cleaning problem—it can affect indoor air quality. Using a sander with a good vacuum system helps keep your home safer and reduces the spread of fine particles. Always dispose of dust bags or canisters responsibly.
Tip: Some advanced models have HEPA filters, which trap even the smallest dust particles and allergens. This is especially important for people with asthma or allergies.
Real-world Example: Home Renovation
When the Jackson family remodeled their 1960s home, they faced a big drywall job. Using a manual sander in the living room created so much dust that it took days to clean up. After switching to a drywall sander with vacuum, they finished the rest of the house with almost no mess. Their new tool captured nearly all the dust, and even their contractor commented on the cleaner air and faster progress.
How To Choose The Best Drywall Sander With Vacuum
With so many options, it is easy to feel overwhelmed. Here is a simple process to help you decide:
- Project size: For whole rooms or ceilings, choose a pole sander with a large pad. For small repairs, a handheld model may be enough.
- Dust control needs: If you are working in a lived-in home, invest in a sander with high dust collection and HEPA filters.
- Budget: Decide how much you want to spend. Remember, cheaper tools may need more repairs or replacements.
- Comfort: Try holding the tool in the store. Is it too heavy? Are the controls easy to reach?
- Reviews and brand reputation: Read reviews from other users and choose brands known for quality.
You can also check professional sources like Family Handyman for trusted advice.
Accessories That Make A Difference
Consider these add-ons for easier, safer, and more efficient work:
- Extension hoses: For large rooms, a longer hose means less moving around.
- Replacement pads: Have extra sanding discs on hand to avoid delays.
- Dust bags and filters: Stock up on replacements, especially for big projects.
- Carrying case: Makes storage and transport easier.
Some kits come with these accessories, which can save you money in the long run.
Upgrades: Going Beyond Basic Models
If you are ready to invest more, high-end drywall sanders with vacuum offer advanced features:
- Brushless motors: Last longer and need less maintenance.
- LED lights: Built-in lights reveal flaws you might miss in normal lighting.
- Variable speed triggers: Let you adjust speed on the fly for different tasks.
- Flexible heads: Pivoting heads help keep the pad flat, even on curved walls.
While these are not essential for everyone, they can make big projects more comfortable and efficient.
Pros And Cons At A Glance
Here’s a quick look at the main advantages and drawbacks:
| Pros | Cons |
|---|---|
| Excellent dust control | Heavier than manual sanders |
| Fast, even sanding | Requires power outlet |
| Reduces cleanup time | Can be expensive |
| Better for your health | Some noise and vibration |
| Professional results | Needs regular filter/bag changes |
Who Should Use A Drywall Sander With Vacuum?
- Professional contractors: For large jobs or frequent work.
- DIY homeowners: For anyone remodeling or repairing walls and ceilings.
- Painters and decorators: To prepare smooth, dust-free surfaces.
- Allergy sufferers: To reduce airborne dust and improve indoor air quality.
If you want a clean, smooth finish with less effort, this tool is worth considering.
Frequently Asked Questions
What Grit Sanding Discs Should I Use For Drywall?
For most drywall projects, start with 120 or 150 grit sanding discs. Use finer grits (180–220) for final passes to get a smooth finish. Coarse grits (below 100) are only for removing heavy buildup or old paint.
Can I Use A Drywall Sander With Vacuum For Ceilings?
Yes, many models have extendable handles designed for ceilings and high walls. Make sure the sander is not too heavy for comfortable overhead use, and always wear eye protection.
How Much Dust Does A Vacuum Sander Really Collect?
A good drywall sander with vacuum can collect 90–98% of dust. However, no system is perfect. Some dust may escape, especially around edges or if the dust bag is full.
Is A Drywall Sander With Vacuum Worth It For Small Projects?
If you are only patching a small area, a manual sanding block may be enough. But for any project that creates a lot of dust—like sanding a whole wall or room—a vacuum sander saves time and keeps your home cleaner.
Can I Connect My Drywall Sander To A Regular Shop Vacuum?
Many sanders are designed to connect to standard shop vacuums. Check the hose size and adapter options before you buy. A powerful shop vacuum with a HEPA filter offers the best dust control.
A drywall sander with vacuum is more than just a convenience—it is a smart investment for anyone who values a clean, healthy work environment and professional results. With the right tool, you can take on big projects with confidence, finish faster, and spend less time cleaning up.
Whether you are a pro or a DIYer, smoother walls and cleaner air are now within easy reach.