If you use your table saw often, you know the metal surface is the heart of the tool. A clean, smooth tabletop keeps your wood moving easily and safely, and helps make every cut more accurate. But sawdust, resin, rust, and even fingerprints can build up, making your saw less effective and even dangerous. Many woodworkers clean their blades but forget the tabletop. In reality, the table surface needs just as much care. Neglecting this part can lead to rough cuts, ruined projects, and costly repairs.
This guide will show you exactly how to clean your table saw metal surface the right way. You’ll learn what supplies to use, which mistakes to avoid, how often to clean, and how to protect the surface from rust. You’ll also see clear examples and get answers to common questions. Whether you’re new to woodworking or have years of experience, you’ll find practical advice to keep your saw running like new.
Why Cleaning The Table Saw Metal Surface Matters
Many people assume a little dust or rust is harmless. The truth is, even a thin film of resin or a few spots of corrosion can cause problems.
A clean table saw metal surface gives you:
- Smoother cuts: Wood glides easily over a polished surface. You get less resistance and more control.
- Higher accuracy: Debris can lift your workpiece off the table, causing uneven cuts.
- Longer tool life: Rust and grit can damage both the table and your wood, leading to more frequent repairs.
- Safer operation: Build-up can make wood catch or jerk, increasing the risk of kickback.
Professional woodshops have a cleaning routine for good reason. Cleanliness is not just about looks—it’s about performance and safety.
Types Of Dirt And Damage You’ll Find
Before you start cleaning, it helps to know what you’re dealing with. Table saw metal surfaces can suffer from several types of contamination and wear:
- Sawdust and chips – The most common, but usually the easiest to remove.
- Pitch and resin – Sticky substances from certain woods, especially pine, that build up over time.
- Rust spots – Caused by moisture, humidity, or even sweaty hands.
- Oily residues – Sometimes from lubricants, sometimes from touching the metal.
- Scratches and nicks – From dropping tools or dragging rough wood.
Some of these problems can be solved with a simple wipe; others need more attention.
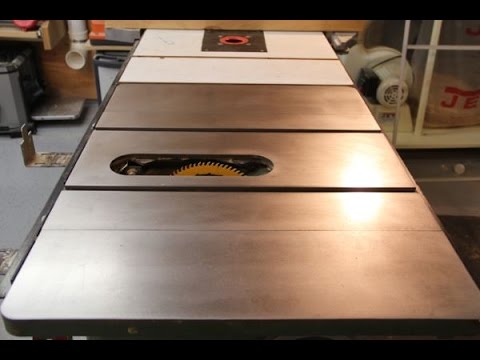
Credit: www.youtube.com
Tools And Supplies You’ll Need
Cleaning a table saw’s metal surface doesn’t require expensive equipment, but using the right products makes the job easier and safer. Here’s what you should have ready:
- Shop vacuum or soft brush (for loose dust)
- Microfiber cloths (better than paper towels)
- Mineral spirits or naptha (for resin and sticky residues)
- WD-40 or a light machine oil (for rust and protection)
- Fine steel wool (#0000 grade) or a synthetic scrub pad
- Plastic scraper (never use metal scrapers)
- Paste wax (not car wax; use Johnson’s Paste Wax or similar)
- Disposable gloves (keeps hands clean and avoids fingerprints)
- Safety goggles (especially if using chemicals)
For tougher jobs, you may also want a random-orbit sander with a very fine pad, but this is optional.
Safety Precautions Before You Start
Always put safety first. Cleaning a table saw is not dangerous, but there are risks if you’re not careful.
- Unplug the saw: Never clean with the saw plugged in.
- Remove the blade: This gives you more room and prevents accidents.
- Work in a ventilated area: Some cleaners have strong fumes.
- Wear gloves: Protects your skin from chemicals and rough surfaces.
- Read product labels: Some solvents are flammable—keep away from sparks.
Many beginners forget to unplug the saw or skip gloves. Even professionals sometimes rush and regret it. Take a minute to prepare, and you’ll avoid the most common mistakes.
Step-by-step: How To Clean Table Saw Metal Surface
Cleaning your table saw’s top is a straightforward process, but there are details that make a difference. Here’s how to do it right.
1. Clear The Table
Remove all accessories: fences, miter gauges, push sticks, and especially the saw blade. Set them aside on a clean surface. Use a shop vacuum or soft brush to remove loose sawdust, chips, or debris. Don’t forget the miter slots—dust often hides there.
2. Inspect The Surface
Look for areas with sticky spots, dark stains, or visible rust. Identify any scratches or rough spots. This helps you focus your cleaning efforts where they’re needed most.
3. Remove Sticky Residues (pitch And Resin)
Apply a small amount of mineral spirits to a microfiber cloth. Wipe the surface, paying extra attention to sticky areas. For stubborn spots, use a fine synthetic pad or #0000 steel wool. Move in the direction of the grain, not in circles.
Tip: Mineral spirits evaporate quickly, so reapply as needed. Avoid using too much liquid—damp, not soaking, is best.
4. Treat Rust Spots
Light rust is common, especially if you live in a humid climate. Spray a little WD-40 on the rust spot, let it sit for a minute, then gently scrub with #0000 steel wool.
For deeper rust, you may need to repeat the process. Avoid sanding aggressively—you don’t want to scratch the surface further.
5. Wipe Down The Surface
After removing residues and rust, wipe the entire surface with a clean, dry microfiber cloth. This removes any remaining cleaner or debris.
6. Apply Paste Wax
This is the secret to a smooth, protected table. Use a soft cloth to apply a thin, even layer of paste wax. Let it haze (usually 5-10 minutes), then buff with a clean cloth until shiny. The wax fills tiny scratches and creates a slick, rust-resistant surface.
Important: Do not use automotive waxes that contain silicone—they can cause problems with finishes and glues.
7. Reinstall Accessories And Blade
Once the table is clean and polished, reinstall your fence, miter gauge, and blade. Check that everything moves smoothly. Wipe down accessories before putting them back.
Cleaning Frequency: How Often Should You Clean?
How often you clean depends on your climate, how much you use the saw, and the types of wood you cut. As a general rule:
- Light use: Every 2-3 months
- Heavy use: Once a month or more
- After cutting resinous woods: Clean immediately after the job
If your shop is humid, check for rust every week. In dry climates, you can go longer between cleanings. Always re-wax after deep cleaning or if the surface feels rough.
How To Remove Heavy Rust From Table Saw Metal Surface
Sometimes, rust gets out of hand—especially if the saw has been in storage or exposed to water. Here’s how to tackle serious rust.
- Vacuum and wipe the surface to remove dust and debris.
- Spray WD-40 or a dedicated rust remover on the affected area.
- Let it soak for 10-15 minutes.
- Use #0000 steel wool or a synthetic pad to gently scrub. For very heavy rust, you may use a razor blade scraper (held flat), but be extremely careful not to gouge the metal.
- Wipe clean and check progress.
- Repeat as necessary until the rust is gone.
- Wipe with a clean, damp cloth to remove all residue.
- Dry thoroughly, then apply paste wax.
Avoid using sandpaper unless you have no other option—it can leave scratches that attract more rust.
Protecting The Table Saw Metal Surface From Future Rust
After cleaning, the best way to keep your table saw top rust-free is regular waxing. But there are other smart steps:
- Control humidity: Use a dehumidifier in your shop if possible.
- Cover the saw: A fitted cover keeps dust and moisture off when not in use.
- Avoid storing wood on the table: Wood can sweat or leak sap.
- Clean hands: Oils and sweat from your hands can cause rust. Wear gloves or wipe the surface after touching.
- Re-wax regularly: Every 1-2 months is ideal for most users.
Here’s a quick comparison of protection methods:
| Method | Protection Level | Cost | Maintenance |
|---|---|---|---|
| Paste Wax | High | Low | Monthly |
| Saw Cover | Medium | Medium | As needed |
| Dehumidifier | High | High | Year-round |
| Rust Preventative Spray | Medium | Low | Monthly |
Common Mistakes To Avoid
Many woodworkers make small errors that reduce the life of their table saw. Watch out for these common mistakes:
- Using water-based cleaners: Water can leave behind moisture and encourage rust.
- Skipping waxing: A clean but unwaxed table will rust quickly.
- Using harsh abrasives: Coarse steel wool or sandpaper can scratch the surface.
- Leaving residue: Not wiping off cleaners or wax fully can cause sticky spots.
- Forgetting the miter slots: Dust and rust here can ruin your accuracy.
- Cleaning with the saw plugged in: Always unplug before cleaning.
- Ignoring accessories: Fences and gauges need cleaning, too.
Learning from these mistakes will save you time and money in the long run.
Special Cases: Cast Iron Vs. Aluminum Table Tops
Not all table saws have the same type of metal surface. Most professional and mid-level saws use cast iron, which is heavy, stable, and rust-prone. Some portable saws use aluminum, which is lighter and doesn’t rust but can get dirty and scratched.
Here’s a quick comparison:
| Surface Type | Rust Risk | Cleaning Method | Protection |
|---|---|---|---|
| Cast Iron | High | Mineral spirits, steel wool, wax | Paste wax |
| Aluminum | Low | Mild cleaner, synthetic pad | Dry cover |
Never use strong acids or harsh abrasives on aluminum—it scratches easily. Waxing is not as critical for aluminum, but it still helps keep things smooth.
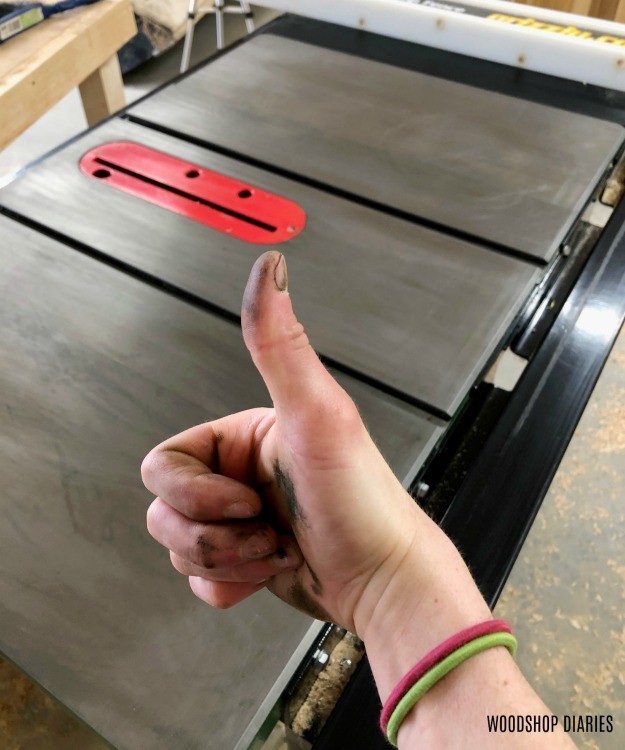
Credit: www.woodshopdiaries.com
Troubleshooting: When Things Don’t Go As Planned
Sometimes, cleaning reveals bigger problems. Here’s how to handle them:
- Deep pitting: If rust has eaten into the metal, you may see small holes or pits. These are hard to remove completely. Clean as best as possible, then wax to fill and protect.
- Sticky residue after waxing: This happens if you use too much wax or don’t buff enough. Remove with mineral spirits and try again with less wax.
- White stains: These can be from water exposure. Rub gently with mineral spirits and buff dry.
- Blade marks or scratches: Light scratches can be polished out with steel wool; deep ones may need professional resurfacing.
If your table saw is very old or neglected, it may never look brand new—but regular care will restore most of its performance.
Advanced Tips For A Perfect Finish
If you want a table saw top that feels like glass, try these expert tips:
- Buff with a random-orbit sander: Use a soft pad and a little paste wax for a mirror finish.
- Double-wax: Apply one coat, buff, then apply a second thin coat.
- Warm the surface: A gentle heat (hair dryer, not a torch) helps wax flow into scratches.
- Use a tack cloth: After waxing and buffing, wipe with a tack cloth to catch any last dust.
Professional woodworkers often spend extra time on the table surface. It may seem like a small detail, but it pays off in every project.
How To Clean Table Saw Accessories
Don’t forget the parts that touch your workpiece—fence, miter gauge, and blade guard. These can all collect resin and rust.
- Fence and miter gauge: Clean with mineral spirits and a microfiber cloth. Wax the surfaces that touch wood.
- Blade: Clean with blade cleaner or mineral spirits, scrub with a brush, and dry before reinstalling.
- Miter slots: Run a folded cloth through the slot, or use a wooden stick wrapped in a cloth.
A clean accessory means smoother movement and less chance of binding.
What To Do After Cleaning: Maintenance Checklist
Cleaning is just the first step. Here’s a simple maintenance routine to follow:
- Inspect for damage: Look for cracks, deep rust, or loose parts.
- Lubricate moving parts: Check gears, trunnions, and elevation wheels.
- Check alignment: Make sure fence and blade are square.
- Test movement: Wood should slide smoothly with no sticking.
- Store properly: Cover the saw if not in use for long periods.
Regular maintenance keeps your saw running safely and accurately.

Credit: www.youtube.com
When To Seek Professional Help
If you find:
- Deep, spreading rust that doesn’t come off
- Large pits or holes in the surface
- Warped or bent table top
- Serious mechanical problems (gears don’t move, motor issues)
It may be time to call a professional or consider replacement. Most cleaning and minor rust can be handled at home, but structural problems need expert attention.
Products To Avoid When Cleaning Table Saw Metal Surface
Not all cleaners are safe for your saw. Avoid:
- Household cleaners (Windex, bleach): Too much water, and some contain ammonia which is bad for metal.
- Abrasive powders (Comet, Ajax): Scratch the surface.
- Silicone spray: Leaves a residue that can ruin wood finishes.
- Automotive wax with silicone: Same problem—use only pure paste wax.
Stick to products made for woodworking tools, or check woodworking forums for safe alternatives.
Environmental Factors: How Your Location Affects Cleaning
- Humid climates: Clean and wax more often, store silica gel packs in the saw cabinet.
- Dry climates: Less rust, but dust can build up. Vacuum frequently.
- Coastal areas: Salt air is very corrosive. Cover your saw and wax more often.
In any location, regular inspection is key. Rust can start in just a few days if conditions are right.
Real-world Example: Restoring A Neglected Table Saw
Let’s look at a real-life situation. A hobbyist buys a used table saw stored in a damp garage for years. The top is covered in rust, resin, and dirt.
- He starts by vacuuming off all dust and debris.
- Uses WD-40 and #0000 steel wool for hours, removing layer after layer of rust.
- Cleans sticky resin with mineral spirits.
- Applies two coats of paste wax, buffing each time.
- After a weekend of work, the table is smooth, shiny, and ready for use.
This shows that even badly neglected saws can be saved with patience and the right steps.
Cost And Time: What To Expect
- Time: A routine cleaning takes 20-30 minutes. Heavy rust removal can take several hours.
- Cost: Most supplies (wax, mineral spirits, steel wool) cost less than $25 and last for many cleanings.
Compared to the price of a new saw or lost work time, this is a smart investment.
Where To Learn More
For more tips and in-depth guides, consider visiting Wood Magazine, which offers excellent woodworking resources.
Frequently Asked Questions
How Do I Remove Deep Rust From My Table Saw Surface?
Deep rust requires patience. Start with WD-40 or a commercial rust remover and #0000 steel wool. For very stubborn spots, use a flat razor blade scraper gently, always keeping the blade flat to avoid gouging. Repeat as needed, then clean and wax the surface. If rust has created deep pits, these may not come out completely but waxing will protect them from further damage.
Can I Use Regular Car Wax On My Table Saw?
Avoid regular car wax, especially those containing silicone. Silicone can transfer to your wood and ruin finishes or cause glue problems. Use only paste wax made for woodworking or plain furniture paste wax without added chemicals.
What If My Table Saw Is Aluminum, Not Cast Iron?
Aluminum tops don’t rust, but they can get dirty and scratched. Clean with a mild cleaner and a soft synthetic pad—never steel wool. Wax is optional but can help keep the surface slick. Avoid harsh chemicals or abrasives.
How Often Should I Re-wax My Table Saw Surface?
For most users, once every 1-2 months is best. If you use the saw daily or live in a humid area, wax more often. Always re-wax after deep cleaning or if you feel the surface is rough or sticky.
Is It Safe To Use Wd-40 On My Table Saw Table?
Yes, WD-40 is safe for cleaning and removing rust. However, always wipe it off completely and finish with a coat of paste wax. Do not leave WD-40 on the surface, as it’s not a long-term rust preventative.
Taking care of your table saw metal surface is one of the smartest things you can do for your woodworking. With regular cleaning, waxing, and the right habits, your saw will give you years of smooth, accurate, and safe cuts.