Removing a chuck from a drill press can seem like a simple task, but if done incorrectly, it can damage your equipment or even cause injury. Whether you need to replace a worn chuck, clean your drill press, or upgrade to a different size, understanding the right way to remove the chuck is essential for anyone using this tool.
Many beginners skip important steps or use the wrong tools, which can make the process harder than it needs to be. This guide will explain everything you need to know, from identifying the right chuck type to handling stubborn chucks, and offer tips you won’t find in most basic instructions.
You’ll learn what matters most, common mistakes to avoid, and how to keep your drill press working safely and efficiently.
Understanding The Drill Press Chuck
Before you start, it’s important to know what a drill press chuck is and why it matters. The chuck is the part of the drill press that holds the drill bit in place. It allows you to change bits quickly and makes sure each bit is held tightly and accurately. There are two main types you’ll find on drill presses: keyed and keyless chucks.
A keyed chuck uses a special tool (the key) to tighten and loosen the jaws. This type is common in older or more heavy-duty presses. A keyless chuck lets you turn the body of the chuck by hand to open and close it. Knowing which type you have is important because the removal process can be different.
Another important part is how the chuck connects to the spindle. Most drill presses use either a Morse taper, a Jacobs taper, or a threaded connection. Each system holds the chuck differently, so the removal steps will change depending on which one you have.
Tools And Materials Needed
To remove a chuck safely and correctly, you’ll need some basic tools. Having the right equipment prevents damage to your drill press and makes the process much easier. Here’s what you should have on hand:
- Chuck key (if you have a keyed chuck)
- Allen wrench (for some chucks with a retaining screw)
- Rubber mallet or soft hammer
- Drift key or taper wedge (for Morse or Jacobs tapers)
- Screwdriver (flat or Phillips, as required)
- Lubricant (like WD-40, for stuck chucks)
- Shop rag or towel
- Safety glasses
- Small tray for holding screws and small parts
Not every drill press uses all these tools. Check your drill press manual or look at your chuck setup to decide which tools you need.
Safety First: Preparing Your Workspace
Safety should always come first when working with any power tool. Removing a chuck from a drill press isn’t dangerous when done right, but accidents can happen if you’re not careful. Here’s how to prepare:
- Disconnect power: Unplug the drill press or switch off the circuit breaker. This is essential. Never work on a tool that’s still connected to electricity.
- Clean your workspace: Remove any clutter, loose tools, or materials from around the drill press.
- Wear safety glasses: Small parts can pop out or metal can chip off during removal.
- Position the table: Lower the drill press table to give yourself enough room to work under the chuck.
- Secure loose clothing and hair: Long sleeves and hair should be tied back to prevent getting caught.
Many beginners forget to disconnect power. This is a common mistake that can lead to serious injury. Always double-check before you start.
Identifying Your Chuck And Spindle Type
Not all drill press chucks are the same. To remove the chuck, you need to know how it’s attached. Here’s how to identify the system:
- Look for a retaining screw: Open the jaws fully and use a flashlight to check for a screw deep inside the chuck. If you see one, it’s likely a threaded chuck.
- Check for a taper: If there’s no screw, the chuck is probably held on by a Morse or Jacobs taper. Sometimes, the spindle will have a slot for a wedge or drift key.
- Manufacturer’s markings: Many chucks have numbers or letters on the body that identify the taper type (like JT33 for Jacobs Taper 33).
- Consult the manual: If you’re unsure, your drill press manual usually explains the chuck type.
Identifying the right system at the start saves you time and prevents unnecessary force or damage.

Credit: www.reddit.com
Step-by-step: Removing A Threaded Chuck
Threaded chucks are screwed onto the spindle and often have a retaining screw inside. Here’s how to remove one:
- Open the chuck jaws completely to their widest point. This gives access to the retaining screw inside.
- Locate the retaining screw. Shine a flashlight into the chuck. Most retaining screws are reverse-threaded (lefty-tighty, righty-loosey). This is designed to stop the chuck from unscrewing during use.
- Unscrew the retaining screw using the correct screwdriver. Turn clockwise to loosen (reverse thread). Place the screw in a tray.
- Hold the spindle. Use a wrench or locking pliers to keep the spindle from turning.
- Unscrew the chuck. Grip the body of the chuck with your hand and turn it counterclockwise. If it’s stuck, use a strap wrench or a piece of rubber for better grip.
- Remove the chuck from the spindle. Set it aside on a towel to avoid damaging the jaws.
If the chuck won’t budge, apply a small amount of lubricant and wait 10-15 minutes before trying again. Never force the chuck—this can strip threads or damage the spindle.
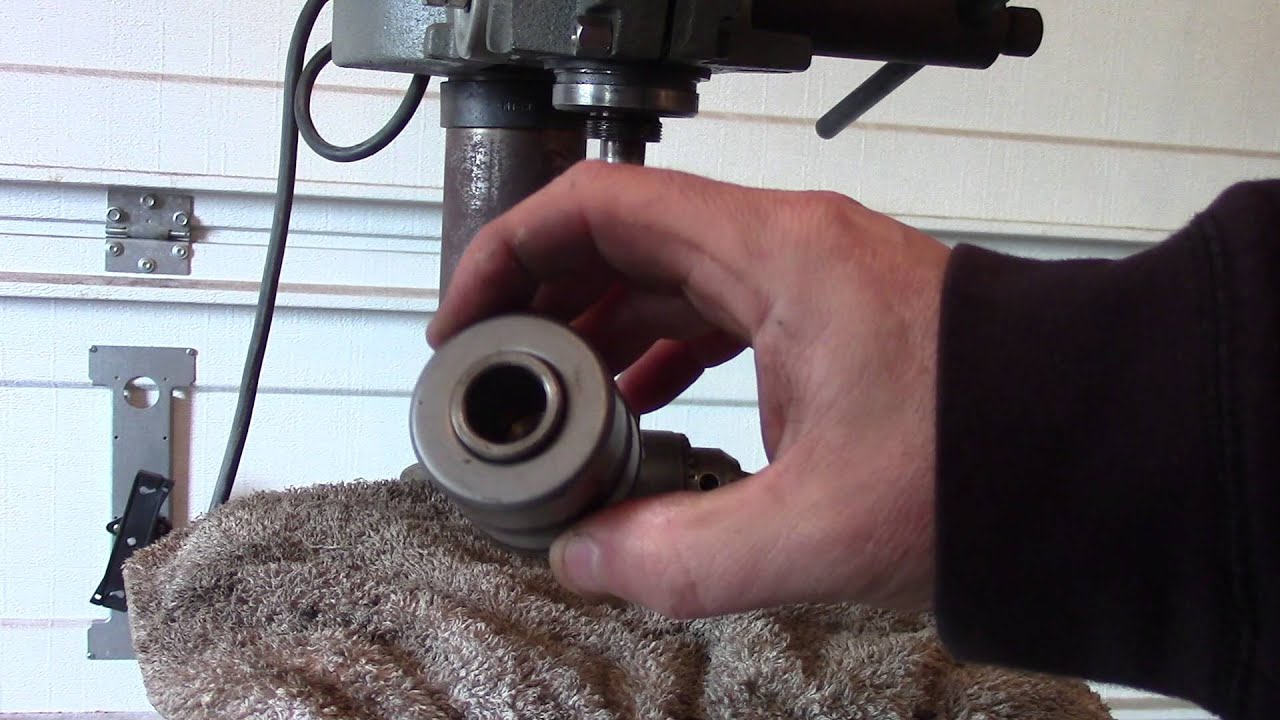
Step-by-step: Removing A Chuck With A Morse Or Jacobs Taper
Tapered chucks are held in place by friction. The spindle and the chuck both have matching tapers. Here’s how to remove a chuck with this system:
- Lower the quill. Use the handle on the side to bring the spindle down as far as it will go.
- Locate the ejection slot. Look for a small slot in the spindle (it may be covered in dust or grease).
- Insert a drift key or wedge. Slide the tool into the slot. The drift key fits between the spindle and the end of the chuck’s arbor.
- Tap gently with a mallet. Strike the key or wedge with a rubber mallet or soft hammer. The chuck should pop off the spindle. Be ready to catch it—some chucks drop suddenly.
- Remove the chuck. Place it on a towel or tray.
If your drill press doesn’t have an ejection slot, you may need to remove the spindle first. Consult your manual or look for retaining screws holding the spindle in place.

Credit: www.ereplacementparts.com
Step-by-step: Removing A Keyless Chuck
Keyless chucks are usually either threaded or tapered. The removal process is similar to the steps above, but the chuck is turned by hand. Here’s what to do:
- Open the jaws completely.
- Check for a retaining screw. If there’s one, remove it as described earlier.
- Hold the spindle. Use a wrench or locking pliers to keep the spindle from moving.
- Twist off the chuck by hand. If it’s tight, use a rubber strap wrench.
- If it’s a taper: Lower the quill, insert a drift key/wedge, and tap gently to release.
Keyless chucks are designed for quick changes, but they can seize if not cleaned or lubricated regularly.
Handling Stuck Or Seized Chucks
Sometimes, a chuck just won’t come off, even after following all the right steps. Here are some advanced techniques for stuck chucks:
- Apply penetrating oil. Spray a small amount into the spindle and let it soak for 20–30 minutes. This helps break down rust or debris.
- Use gentle heat. A hair dryer can warm the chuck slightly, causing metal to expand and making removal easier.
- Tap, don’t hammer. Use short, sharp taps with a rubber mallet. Excessive force can bend or break the spindle.
- Check for hidden set screws. Some chucks have a second, smaller screw deeper inside. Use a flashlight and probe gently.
- Try “shock and twist”. Hold the spindle and give the chuck a quick, firm twist. The sudden motion sometimes breaks the bond.
If nothing works, don’t keep forcing it. This is a common beginner mistake that can lead to expensive repairs. In some cases, it may be best to take the drill press to a professional or a machine shop.
Cleaning And Inspecting After Removal
Once you remove the chuck, it’s a good time to clean and inspect both the chuck and the spindle. This helps prevent future problems and keeps your drill press running smoothly.
- Wipe down the spindle and chuck with a shop rag to remove dust, grease, and metal shavings.
- Check for wear or damage. Look for cracks, worn jaws, or damage to the spindle. Replace any damaged parts.
- Clean the taper or threads. Use a small brush to remove debris from the spindle and inside the chuck.
- Apply a light lubricant to moving parts, but avoid getting oil on the taper or threads, as this can cause slipping.
- Store the chuck safely. If you’re not reinstalling it right away, keep it in a clean, dry place.
Inspecting and cleaning is an often-overlooked step that can extend the life of your drill press.
Reinstalling Or Replacing The Chuck
After removal, you may want to reinstall the same chuck or install a new one. Here’s how to do it properly:
- Clean all parts. Make sure both the spindle and the chuck are free from oil, dust, and debris.
- Align the chuck. For tapered systems, line up the tapers exactly. For threaded systems, start the chuck carefully onto the threads.
- Seat the chuck firmly. For tapers, push the chuck onto the spindle by hand, then give a sharp tap with a rubber mallet to set it.
- Install the retaining screw (if required). Tighten it in the correct direction (remember, some are reverse-threaded).
- Test the chuck. Run the drill press at low speed to check for wobble or vibration. If you see any, remove and reinstall the chuck.
When replacing the chuck, make sure you buy one with the correct size and taper or thread type. Using the wrong chuck can damage your drill press and create dangerous situations.
Comparing Chuck Types And Removal Methods
Different chuck types and spindle connections require different removal methods. Below is a comparison to help you understand the main differences.
| Chuck Type | Attachment Method | Common Removal Tool | Difficulty Level |
|---|---|---|---|
| Keyed Chuck | Threaded or Tapered | Chuck Key, Wrench, Drift Key | Medium |
| Keyless Chuck | Threaded or Tapered | Hand, Strap Wrench, Drift Key | Easy |
| Jacobs Taper | Tapered | Drift Key, Wedge | Medium |
| Morse Taper | Tapered | Drift Key, Mallet | Medium |
| Threaded Chuck | Screwed On | Screwdriver, Wrench | Medium |
Understanding these differences helps you choose the right method and tools for your drill press.
Common Mistakes To Avoid
Many users, especially beginners, make the same errors when removing a chuck from a drill press. Knowing these in advance can save you time and prevent damage.
- Forcing the chuck: Applying too much force can bend the spindle or break the chuck.
- Skipping cleaning: Dirt and debris can make reinstallation difficult and cause wobble.
- Using the wrong tool: Using pliers or metal hammers can damage the chuck or spindle.
- Not supporting the chuck: When it comes loose, it can fall and break or injure your hand.
- Ignoring the retaining screw: Forgetting to remove a reverse-threaded screw is a common cause of stuck chucks.
- Forgetting safety: Not unplugging the drill press or wearing safety glasses increases the risk of accidents.
If you’re ever unsure, check your drill press manual or consult with a more experienced user.
Tips For Easier Chuck Removal
Here are some expert tips that make removing a chuck easier and safer:
- Mark the position: Before removing, mark the position of the chuck and spindle with a marker. This helps realign during installation.
- Use the right lubricant: Penetrating oil works better than regular oil for stuck chucks.
- Pre-warm the spindle: Slight heat can help expand the metal and loosen the chuck.
- Keep all screws and parts organized: Losing a retaining screw or wedge can delay your project.
- Check for upgrades: If your chuck is old or worn, this is a good time to upgrade to a better model or keyless system.
When To Seek Professional Help
Sometimes, removing a chuck is more difficult than expected. If you’ve tried all the steps and the chuck still won’t budge, or if you see damage to the spindle or chuck, it’s best to seek help from a professional. Machine shops have special tools and experience to handle tough removals without damaging your equipment.
Trying to force a stuck chuck can lead to expensive repairs.
Real-world Example: Upgrading A Drill Press Chuck
Let’s look at a practical example. Mike, a hobby woodworker, wanted to upgrade his old drill press with a new keyless chuck. He followed the steps for his threaded chuck but found it stuck. After applying penetrating oil, waiting 30 minutes, and using a rubber strap wrench, the chuck came off smoothly.
He cleaned the spindle, installed the new chuck, and found his drill press ran more smoothly with less bit slipping.
This example highlights two insights beginners often miss: using the right oil and being patient. Rushing the process or using too much force could have damaged Mike’s drill press.
Data: How Often Should You Remove Or Replace A Chuck?
You don’t need to remove the chuck after every use. Most users only remove it for cleaning, repair, or upgrade. According to equipment manufacturers, the average home user removes or replaces the chuck every 1–2 years, while heavy shop users may do it every 6 months.
| User Type | Average Removal Frequency | Reason for Removal |
|---|---|---|
| Hobbyist | Every 1–2 years | Cleaning/Upgrade |
| Professional Shop | Every 6–12 months | Maintenance/Wear |
| Industrial | Every 3–6 months | Heavy Use/Replacement |
Regular inspection and cleaning help prevent the need for emergency repairs.
Maintenance Tips After Chuck Removal
Once you’ve removed the chuck, don’t skip maintenance. Here’s how to keep your drill press in top condition:
- Lubricate moving parts: But avoid oiling the spindle taper or threads.
- Check alignment: Misalignment causes vibration and reduces accuracy.
- Tighten all bolts and screws: Loose parts can lead to safety risks.
- Inspect belts and pulleys: Worn belts reduce power and performance.
- Test run: Always run the drill press at slow speed before returning to full use.
Taking these steps after each chuck removal will extend the life of your drill press.
Troubleshooting Common Problems
If you encounter issues after removing or replacing the chuck, here’s how to fix them:
- Wobbling drill bit: Remove the chuck and clean both the spindle and the chuck taper or threads.
- Chuck won’t tighten: Check for damage or debris inside the jaws.
- Chuck falls off: Make sure the taper is clean and the chuck is firmly seated. For threaded chucks, check the retaining screw.
- Unusual noise or vibration: Inspect all parts, including belts and pulleys, for wear.
If problems continue, consult your manual or contact the manufacturer for advice.
Credit: www.youtube.com
Upgrading Your Chuck: What To Consider
When upgrading your drill press chuck, consider these factors:
- Chuck size: Choose the right size for your drill bits (usually 1/2” or 5/8” for most presses).
- Type: Decide between keyed and keyless based on your needs.
- Taper or thread compatibility: Make sure the new chuck matches your spindle.
- Brand and quality: High-quality chucks last longer and provide better accuracy.
- Budget: Prices range from $20 to $100+, depending on size and brand.
Doing your research before buying ensures your new chuck will fit and work correctly.
For more detailed information on drill chucks and their types, you can check Wikipedia’s drill chuck page.
Frequently Asked Questions
How Do I Know If My Drill Press Chuck Is Threaded Or Tapered?
Open the jaws and look for a retaining screw inside. If you see one, it’s likely a threaded chuck. If not, it’s probably a tapered chuck. You can also check the manufacturer’s markings on the chuck or consult your drill press manual.
Why Is My Chuck Stuck And Won’t Come Off?
Chucks can get stuck due to rust, debris, or being over-tightened. Applying penetrating oil, using gentle heat, and tapping with a rubber mallet usually helps. Never use excessive force, as this can damage your drill press.
Can I Replace A Keyed Chuck With A Keyless Chuck?
Yes, as long as the new keyless chuck matches your spindle’s taper or thread size. Always check compatibility before buying a new chuck.
How Often Should I Remove And Clean My Drill Press Chuck?
For most hobbyists, once every 1–2 years is enough. If you use your drill press daily or in a dusty environment, check and clean the chuck every 6 months for best performance.
What Should I Do If I Lose The Chuck Key Or Drift Wedge?
Replacement chuck keys and drift wedges are available at most hardware stores or online. Make sure to get the correct size for your drill press model.
Removing a chuck from a drill press is a straightforward process with the right knowledge and tools. Taking your time, following each step carefully, and performing regular maintenance will keep your drill press running safely and smoothly for years to come.